Zoook OpenERP module Configuration
In this section will configure the module of Zoook in our OpenERP instance.
Checkout and install requirements
In the Requirements guide are listed what you need, you must be install all following the standard steps for each type of packages.
Installing the Zoook’s sources
To checkout the OpenERP modules and depends, go to any folder you want to store the repositories, and execute this:
$ bzr branch lp:~zoook-community/zoook-esale/zoook-6.1 zoook
$ bzr branch lp:~zoook-community/zoook-esale/zoook-extra-addons-6.1 zoook-extra-addons
You must be copy all the modules in these folders into the addons folder
of OpenERP, or add the paths of these branchs into the OpenERP file
configuration. Go to OpenERP Documentation
to get more information about the configuration file.
Installing the Zoook’s modules in OpenERP
Go to Settings > Modules > Update Modules List after copy or linking the modules into the addons path.
Then go to Settings > Modules > Modules, and search and install the module zoook: will be installed with all dependencies.
Create a Shop
Zoook is multi-shop, but not multitenancy: that means than you can have more than one shop configured in OpenERP, each with its own products, categories, and all shop in the same OpenERP database (and therefore the same instance), but in the Django Apps side, you must be have one instance by shop, each instance with its own Zoook database, configuration and Python installation (and each running in a different process and HTTP port).
To create a shop go to Sales > Configuration > Sales > Shop, by default one shop exist with the name “Shop 1”, you can use this, or create another. The shops objects are not only related to Zoook, you can configure several shops to reflect your business infrastructure. Then when you sale something in the Sale Order you can select in which shop you are. And when a customer buys something from Zoook, the shop configured for this Zoook instance will be appear in the order.
So to setup a Zoook shop in an existing shop or a new one, in the edit form check the “OpenERP e-Sale” field. There will be new sections in the form, related to Zoook.
Note
When you edit a register in OpenERP in most cases the ID in the database is not visible, but if you see in the URL, the parameter “id” has this ID. You have to get this shop ID to configure the OERP_SALE and OERP_SALES parameters of the Django-Zoook configuration.
Configuring the Shop
You must be fill all the mandatory fields before save the shop. These are the important fields:
Root product Category: The root category of all the sub-categories will be displayed in the store. You must be create or select one (also with the “OpenERP e-Sale” check activated). Zoook support n-levels of sub-categories.
Email Sale Order: The Poweremail template will be
used to render the confirmation email of a Sale Order. To create the template,
you can use the example in the source code
of zoook module.
Languages: Zoook is multi-language, you can configure the same languages of your OpenERP database in Zoook, and show your products in the store in multiples locales.
Delivery: Deliveries methods. You must be have one at least. If you don’t have delivery service, you can configure a “nodelivery” method, with a related delivery pricelist with zero cost price.
Payment: Supported customer payment methods. Can be virtual (like PayPal),
or not virtual like the “cashondelivery” method. You must be have one
at least. Each payment method has a related application to handle the
payment transaction. Check the supported methods by the Web Apps in the
django_zoook.payment package.
SSH Connection: The SSH parameters to connect with Django-Zoook application. Fill this with the standard parameters needed in this type of connection. Check the following section about the SSH server and the necessary steps to get a successfully connection.
Configuring SSH Connection
First, you must be installed and running a SSH server (like OpenSSH) in the same host where Django-Zoook are. If it’s not the same host than the OpenERP server, you must be procure the access to this SSH server in Django-Zoook to OpenERP server (check the firewall configuration).
Also you must be import the SSH certificate in the “know hosts” list of consumer host, this can be done when you try to connect from the console: if the SSH client don’t recognize the certificate (it’s not a public key), will be ask you to import the key, or abort the connection.
The import of the certificate must be achieved even if the Django-Zoook daemon and the OpenERP daemon reside in the same host.
This is an example of connecting to your localhost through SSH command line tool, and import the certificate:
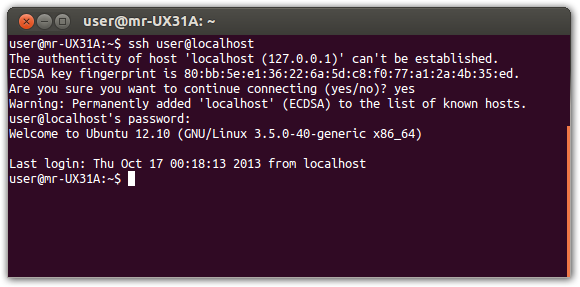
If you don’t perform this step, then Zoook module won’t connect with Django-Zoook. After these steps, in OpenERP go to the shop configuration, and in the “SSH Connection” click the “Test Connection” button to check if the configuration are OK.
Product Configurations
After configure the Shop, you have to configure some categories (in the three of the root category), and configure the products. Each product and category must be checked in the “OpenERP e-Sale” field to be exported. In the product form, the categories must be configured in the “Extra Categories” tab (the “Category” field is not used by Zoook).
Also remember, the shop where the product will be exported must be configured in the section “Website” of the tab “e-Sale”, remember than Zoook is multi-shop and the shop must be specified, or will not be exported.
Note
You can attach many images for each product, but for the moment Zoook
only supports Links pictures. The pics stored in the database (uploaded)
will be exported incorrectly. The link’s images are exported well, and
resized and cached by Zoook in the django_zoook/static/catalog folder.
Export the catalog
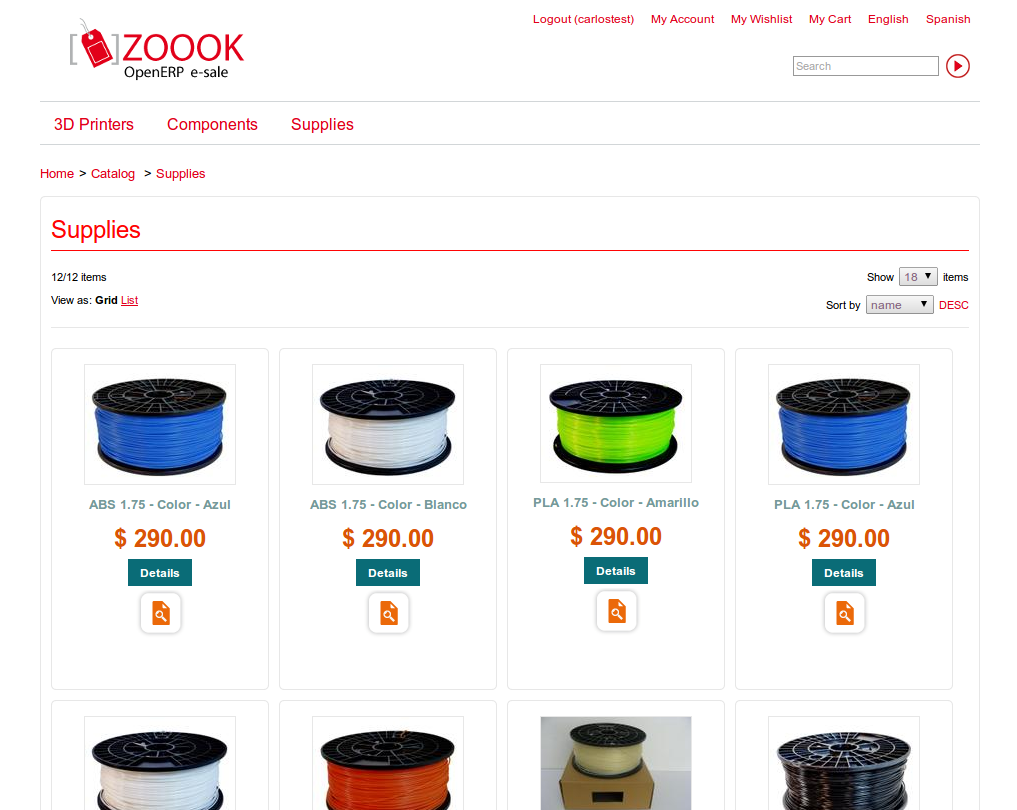
Once finished the initial catalog setup, you have to export all the data to Zoook webshop. To do the task go to Sales > Configuration > Sales > Shop menu, and enter to the shop to synchronize. In “Actions” tab in the bottom section, click in the buttons to export, in the same order are showed, depending of the data you want to export. If it’s the first export, click in the “Global configuration” before the other export tasks.
After export the catalog, a category page will look like this:
Note
When you export data, only the newest information are exported according to the last exportation date. If the process fails, the date will be updated anyway, and you won’t export the information again, at least you first edit, or modify manually the last exportation field.
Also the delete operations are not exported, so if you delete a product,
you must be delete from the Django Admin Site of Zoook (/manager URL),
or you can edit the “Active” field or the “Visibility” field of the
product to deactivate.
Configuring Poweremail
This is the OpenERP module responsible to send emails when a client confirms an order, or when a user is registered or changes their password.
A good guide of this module is here.
Note
Install poweremail module only from
lp:~zoook-community/zoook-esale/zoook-extra-addons-6.1, this version
has some important fixes to work with Zoook.
Email accounts
Go to Poweremail > Configuration > All accounts, and create a new account, the following example is a SMTP Outgoing account in Gmail:
- Name: A name or brief description
- Server: smtp.gmail.com
- SMTP Port: 587
- Use SSL/TLS: False
- Use TLS: True
- Email ID: xxx@gmail.com (Gmail account id)
- User Name: xxx@gmail.com
- Password: Gmail password
- Related Name: The OpenERP user owner of this account, the same used in Zoook
- Company Mail A/c: No
This account will be used to send email notifications when you add a Zoook user to an existing client in OpenERP (Django tab in partner form), or when you reset also from OpenERP the Zoook user password.
Email configuration in Zoook
The emails sent by the shop are procesed by Poweremail, but dispatched by Zoook with the Django API. So, you have to configure the email account in Django Zoook App too, in the config.py file.
Templates
The process of defining templates is used to configure email for a specific model, like the Sale Order object, or the Reset Password wizard object.
To create a new template go to Poweremail > Templates > Email Templates, and click in Create button.
In the folder util/poweremail-templates-examples of zoook module you will be find the necessary templates for each type of object where Zoook launchs emails, you can use a custom text/HTML for this emails, or send to the clipboard the content of this examples and paste into the OpenERP form, in the Body (HTML) field.
This is an example of template for Sales Order:
- Body (HTML): The content of sale.order-email-en.html example template
- Model: Sales Order (sale.order)
- Recepient (To):
${object.partner_id.dj_email or object.partner_order_id.email}- Default BCC: A email to recibe the Sale Order notifications, like myemail@company.com (optional)
- Default Subject:
My Shop - Sale Order Ref ${object.name} - ${object.shop_id.name or object.company_id.name}- Language:
${object.partner_id.lang}- Templating Language: Mako Templates
After create this template, you have to setup in the shop configuration field.
Example for Create User wizard:
- Body (HTML): The content of zoook.create.user.wizard-email-en.html example template
- Model: zoook.create.user.wizard
- Recepient (To):
${object.email}- Default Subject:
My Shop - New User- Templating Language: Mako Templates
Example for Reset User (reset password create) wizard:
- Body (HTML): The content of zoook.reset.user.wizard-email-en.html example template
- Model: zoook.reset.user.wizard
- Recepient (To):
${object.partner_id.dj_email}- Default Subject:
My Shop - Reset User Password- Templating Language: Mako Templates