Django-Zoook Configuration
In this section will be configure the web shop part of Zoook.
Note
Zoook web shop is a Django project. Read first about Django framework. The official docs is a great documentation: https://docs.djangoproject.com/en/1.4
Checkout and install requeriments
In the Requirements guide are listed what you need, you must be install all, following the standard steps for each type of packages.
Installing the Zoook sources
To download the latest version of Django-Zoook, go to any folder you want to save the repositories, and checkout it with Bazaar:
$ bzr branch lp:~zoook-community/zoook-esale/django-zoook-6.1 django-zoook
This will download all the source code in a new folder django-zoook.
Create Zoook Database
To manage users and databases in PostgreSQL will be use PSQL command line tool, but you can use other tools like the PgAdmin GUI, or the web tool phpPgAdmin.
To execute PSQL interpreter as postgres user
(the root user in PostgreSQL):
$ sudo -u postgres psql
The system will ask your password, and then you will be at the PostgreSQL command line prompt:
postgres=#
To exit the psql:
postgres=# \q
Create PostgreSQL user
At first create a PostgreSQL database for Zoook. In a development environment
you can use the user openerp. This way you don’t have to create a new one.
In production its recommended to make sure that every user has an exclusive
access to the database.
The command to create a PostgreSQL user:
$ sudo -u postgres createuser --createdb --no-superuser --no-createrole --pwprompt zoook
Create the BBDD
This is mandatory, the Zoook database stores all the catalog cache, the registered users (mapped as client in OpenERP), and others configuration tables.
First enter with psql command, and then create the database with:
postgres=# CREATE DATABASE dj_zoook OWNER zoook;
To verify the correct creation of the database, exit with \q command, and
then enter with:
$ sudo -u postgres psql dj_zoook -U zoook
Password for user zoook:
psql (9.1.9)
Type "help" for help.
dj_zoook=>
Parameterization Django-Zoook
Django-Zoook is a Django application, so many parameters are standard of this framework.
Configuration file: config.py
Edit the file and adjust the parameters of the connection to OpenERP. You’ll have to configure all passages. The following ones are especially important for the interconnection with the OpenERP server.
DATABASES: Defines where and how Zoook finds its database. If you are
installing the environment in your local computer, verify the NAME,
USER, and PASSWORD parameters:
DATABASES = {
    'default': {
        'ENGINE': 'django.db.backends.postgresql_psycopg2',
        'NAME': 'dj_zoook',
        'USER': 'zoook',
        'PASSWORD': 'postgres',
        'HOST': 'localhost',
        'PORT': '5432',
    }
}
OERP_CONF: Defines the connection to the XML-RPC service of OpenERP. In a local environment, check the first three parameters.
OERP_CONF = {
    'username':'admin',
    'password':'admin',
    'dbname':'openerp',
    'protocol':'xmlrpc', #xmlrpc
    'uri':'http://localhost', #xmlrpc
    'port':8069, #xmlrpc
#    'protocol':'pyro', #pyro
#    'uri':'localhost', #pyro
#    'port':8071, #pyro
}
Locale: Defines the languages of your web shop. They have to be the same as in OpenERP:
LANGUAGE_CODE = 'es'
LANGUAGES = (
    ('en', ugettext('English')),
    ('es', ugettext('Spanish')),
)
DEFAULT_LANGUAGE = 1
LOCALE_URI = True
LOCALEURL_USE_ACCEPT_LANGUAGE = True
LOCALES =  {
    'en':'en_US',
    'es':'es_ES',
}
OERP_SALE: Indicates which OpenERP shop must be used in Zoook.
OERP_SALE = 2 #Sale Shop. All price, orders, ... use this Sale Shop ID.
OERP_SALES = [2] #Sale Shops. Orders by Sale Shops
Email: Emails notification are parsed by Poweremail in OpenERP, but are sent by Zoook with the Django framework support. This is an example with a Gmail connection:
EMAIL_USE_TLS = True
EMAIL_HOST = 'smtp.gmail.com'
EMAIL_HOST_USER = 'myemailuserXXX'
EMAIL_HOST_PASSWORD = 'mypasswordXXX'
EMAIL_PORT = 587
Log configuration file: logconfig.py
Zoook uses the standard logging library in Python. If you want
to verify the log setup, check the logconfig.py file.
By default the log output are located in ../django-zoook/log/zoook.log
file. Depending of the user’s system and file system configuration,
you will need to create manually the container directory (“log” folder),
and with the necessary permissions to get read/write access.
Note
When Zoook starts if you get a IOError in the output console related
with the zoook.log file, and the process is aborted, then you don’t have
the permissions to access the file, or the file cannot be created because
the container “log” folder don’t exist.
Create Zoook’s database tables
To generate the database structure, go to the django-zoook/django_zoook
folder with the command line. Then run:
$ python manage.py syncdb
The script will ask if you want to create a new super-user. Affirm and pass it the needed data for the account you’ll later want to administer Zoook with.
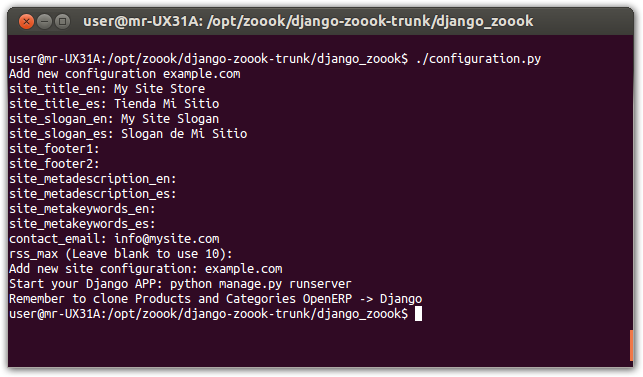
Create Zoook’s configuration
To generate the initial configuration, go to the django-zoook/django_zoook
folder with the command line. Then run:
$ ./configuration.py
The script will ask you some basic information, like the store name, slogan, etc.
Run !
Now you can run Zoook. Use the usual way in a normal Django App:
$ python manage.py runserver
The application will run in the port number 8000, and will accept only local connections. To get more options of how to start a Django application go to the official documentation.
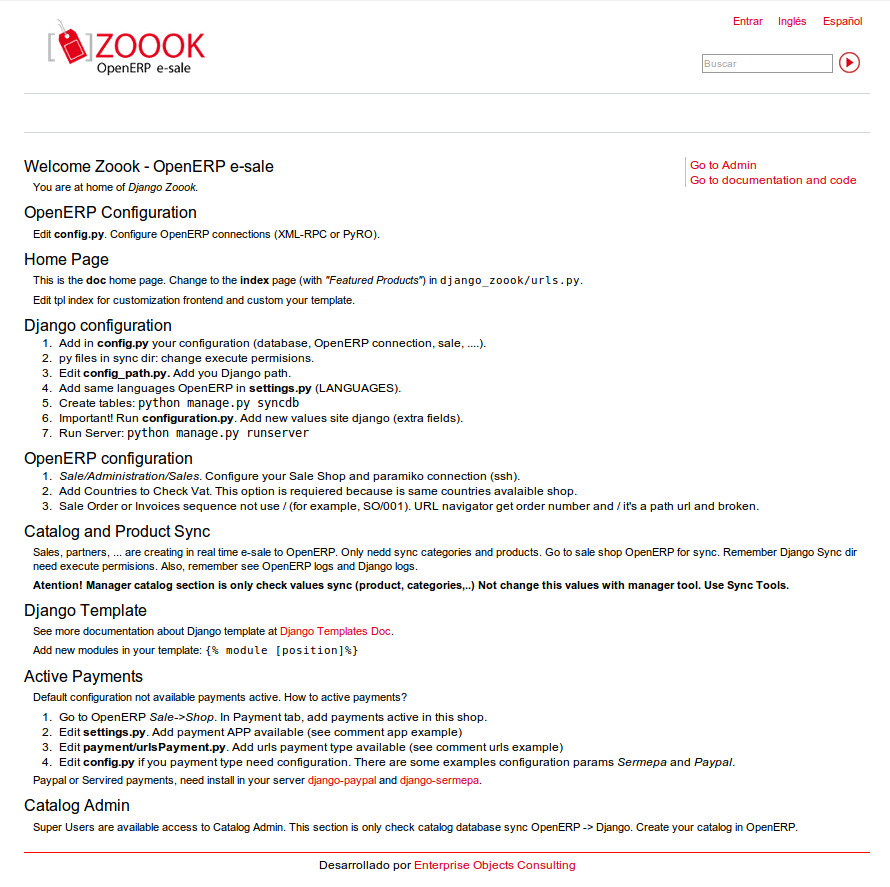
To view the page open a web browser and type http://localhost:8000 in the URL bar and press enter.
The application will look like this:
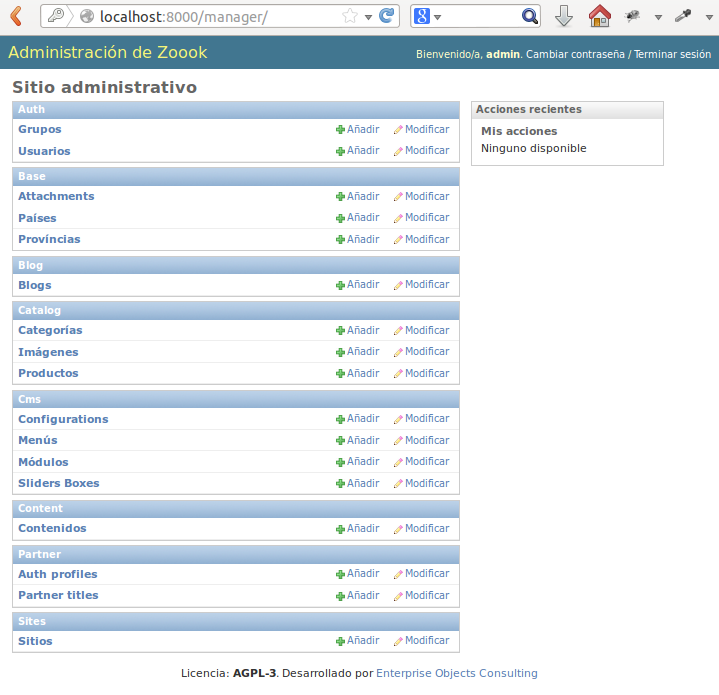
Also Zoook has an Administrator page (Django Admin Site module), you can enter
with the /manager URL, then the username and password of the super-user
will asked to access the page: